

Balloon garlands have a way of instantly turning an ordinary space into something celebration-ready. They feel playful, styled, and surprisingly high-end when done right. The best part? You don’t need professional tools or years of experience to make one that looks polished.
Whether you’re decorating for a birthday, baby shower, holiday party, or just want a fun backdrop for photos, this guide walks you through simple steps that work every time. No stress. No guesswork. Just a garland you’ll actually be proud to hang.
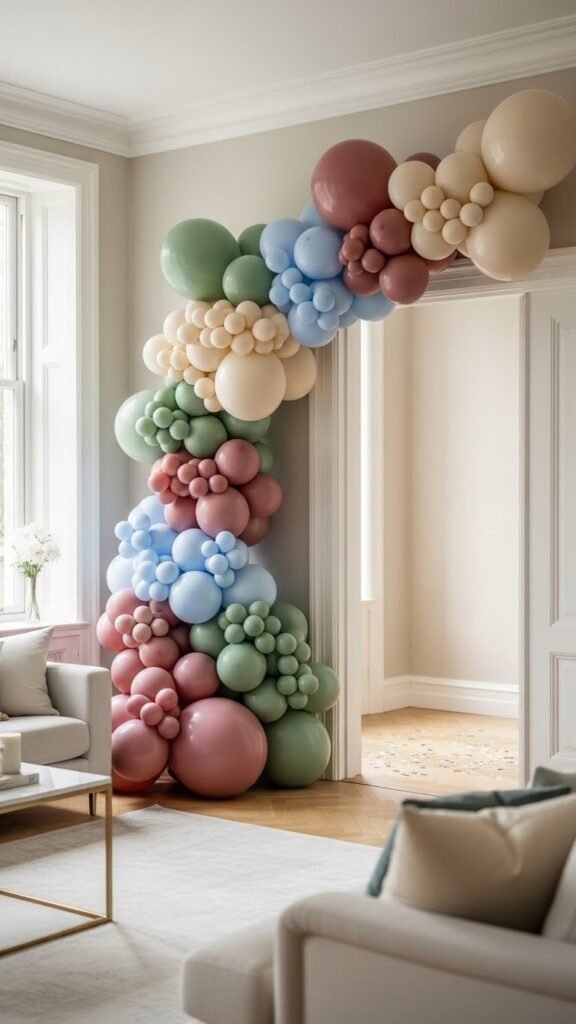
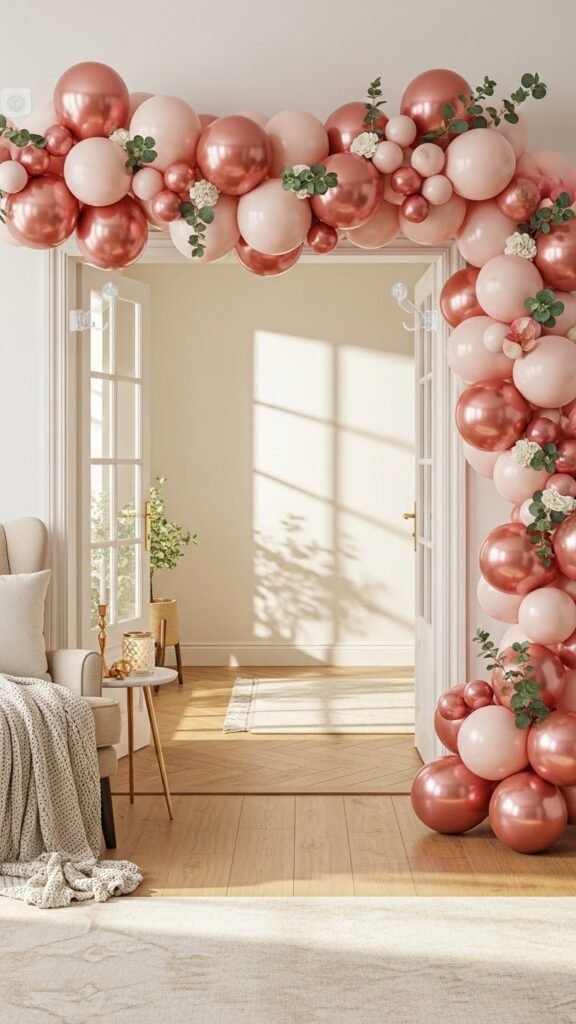
Choose a Color Palette That Works Anywhere
Before inflating a single balloon, decide on your colors. This step sets the tone and prevents your garland from looking chaotic.
A good rule is to pick three to five colors:
- One main color
- One or two supporting shades
- One neutral (white, cream, or clear)
Soft palettes feel calm and elegant. Bright mixes feel energetic and playful. Both work—it’s about intention.
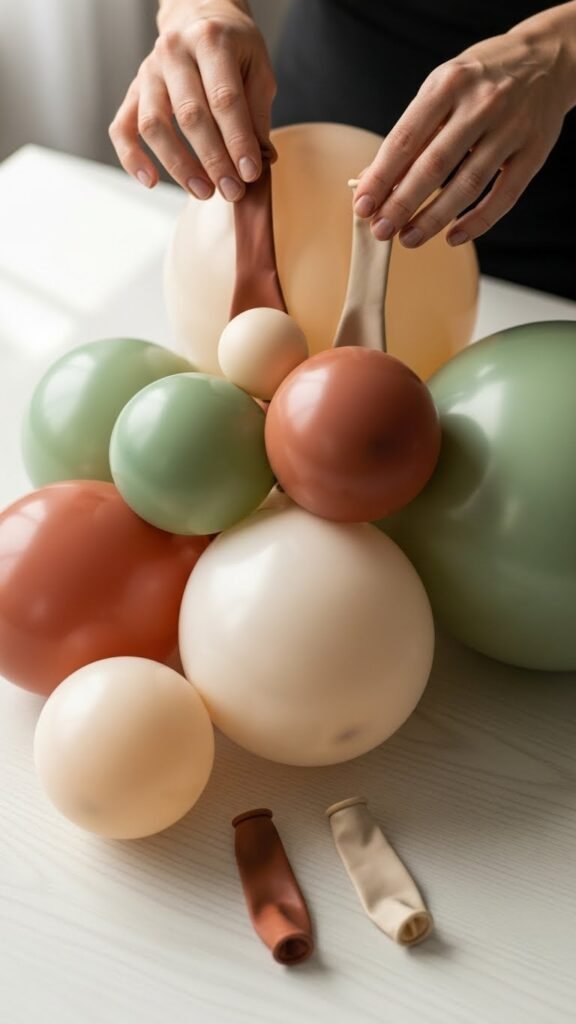
Helpful tip:
- Use different shades of the same color for a layered look
- Mix matte and slightly glossy balloons for depth
- Skip overly shiny finishes if you want a modern style
Planning colors first saves time later and keeps your garland cohesive from start to finish.
Use Different Balloon Sizes for a Professional Look
The secret to those “wow” balloon garlands you see online? Size variation.
If all balloons are the same size, the garland looks flat. Mixing sizes adds texture and movement.
Common size mix:
- 5-inch balloons for filling gaps
- 10–12 inch balloons for structure
- 18-inch balloons for statement moments
You don’t need exact measurements. Slight imperfections make it feel organic rather than stiff.
Quick tip:
- Inflate balloons slightly differently so they aren’t perfectly round
- Under-inflated balloons look softer and more modern
Build the Garland on the Ground First
Trying to build a balloon garland in the air is frustrating. Always assemble it on the floor or a large table.
What you’ll need:
- Balloon decorating strip or fishing line
- Hand pump or electric pump
- Scissors
Steps:
- Inflate balloons and tie them off
- Attach balloon knots into the decorating strip holes
- Alternate colors and sizes as you go
- Step back often to check balance
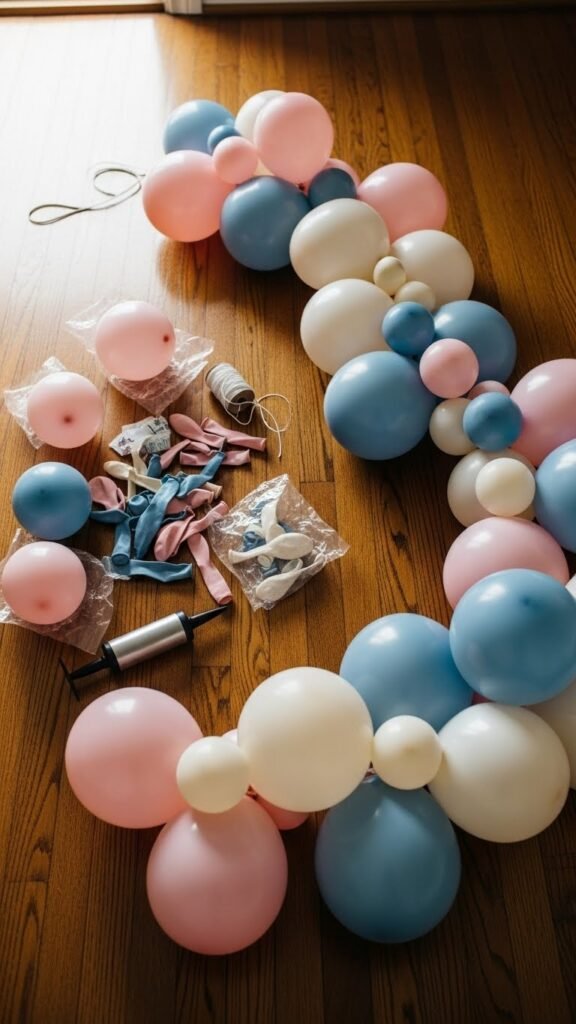
Don’t aim for perfection. Slight randomness makes the garland feel full and natural.
Fill Gaps for a Full, Styled Finish
Once your main garland is built, you’ll notice small empty spaces. This is where it goes from “okay” to “amazing.”
Use small balloons to:
- Tuck into gaps
- Soften harsh transitions between colors
- Add depth near curves
Attach them using:
- Glue dots
- Double-sided tape
- Small tied balloon clusters
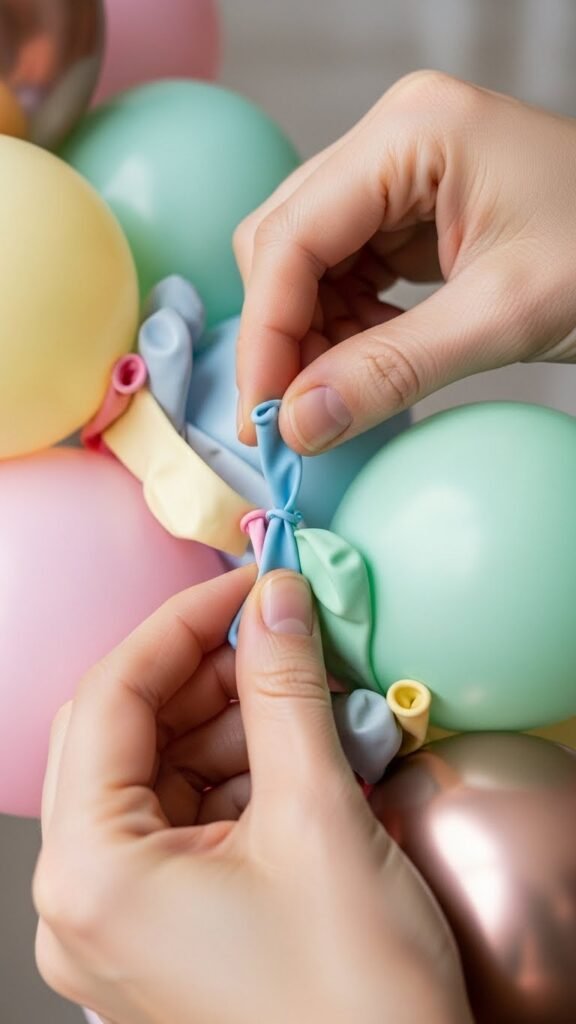
This step takes only a few minutes but makes a huge visual difference.
Hang It Securely Without Damaging Walls
Where you hang your garland matters just as much as how you build it.
Best hanging options:
- Removable hooks
- Command strips
- Painter’s tape for lightweight areas
Tips for placement:
- Follow natural lines like doorways or windows
- Let one side trail longer for an organic look
- Avoid stretching the garland too tight
If it droops slightly, that’s a good thing. Balloon garlands look better when they flow.
Keep It Looking Fresh Longer
Balloon garlands can last longer than you think with a little care.
To extend their life:
- Inflate balloons the same day or night before
- Keep away from direct heat or sharp sunlight
- Avoid over-inflating
If a balloon pops:
- Remove it carefully
- Fill the gap with a smaller balloon
Most indoor garlands look great for one to two days, sometimes longer in cooler rooms.
Simple Styling Ideas That Always Work
You can keep your garland simple or dress it up with extras.
Easy add-ons:
- Faux greenery tucked between balloons
- Soft fabric draped underneath
- Matching table decor nearby
Keep accessories minimal so the balloons stay the focus.
Final Thoughts
Balloon garlands don’t need to be complicated to look stunning. With the right colors, mixed sizes, and a relaxed approach, you can create something that feels intentional and beautifully styled every time.
Save this guide for your next celebration, and enjoy how easy it feels once you know the process.

Leave a Reply