

Nothing transforms a birthday space faster than décor that floats overhead. Balloon chandeliers do exactly that. They draw the eye up, add drama, and instantly make a party feel styled instead of thrown together. Best of all, you don’t need a professional decorator or a massive budget to pull it off.
If you’ve ever saved luxe party photos on Pinterest and wondered how they did that, this guide breaks it down step by step.
What Is a Balloon Chandelier (and Why It Looks So Luxe)
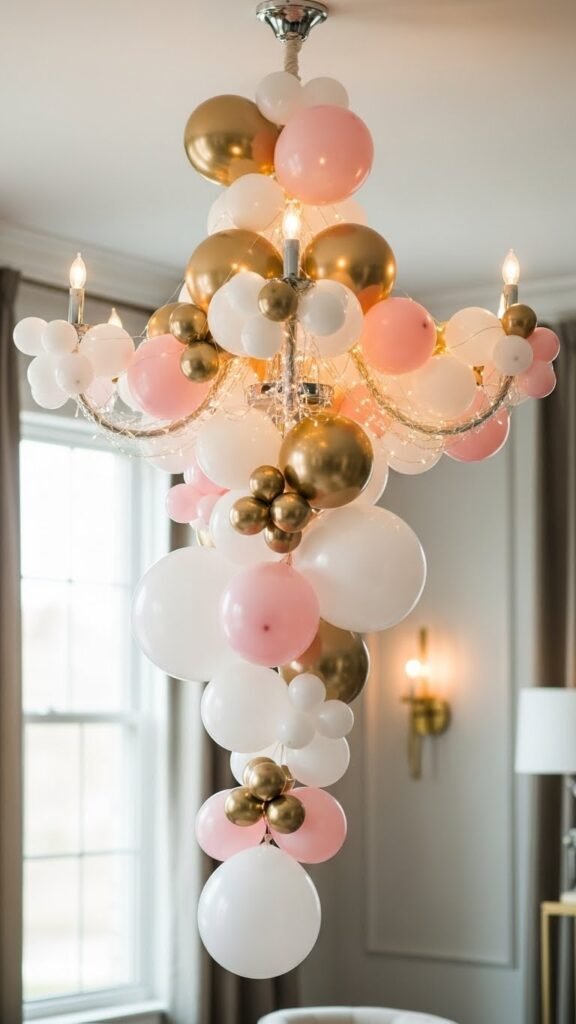
A balloon chandelier is a hanging balloon arrangement designed to mimic the shape and flow of a traditional chandelier. Instead of crystals or metal arms, you use balloons, fishing line, and light details to create movement and volume.
Why they work so well:
- They fill vertical space, making rooms feel taller
- They look custom and high-end when styled with a limited color palette
- They photograph beautifully from every angle
- They work for kids, teens, and adult birthdays
The secret isn’t expensive supplies. It’s intentional shape and balance.
Choose a Color Palette That Feels Upscale
Before inflating a single balloon, decide on your color story. This step alone determines whether your chandelier looks elegant or chaotic.
Popular luxe combinations:
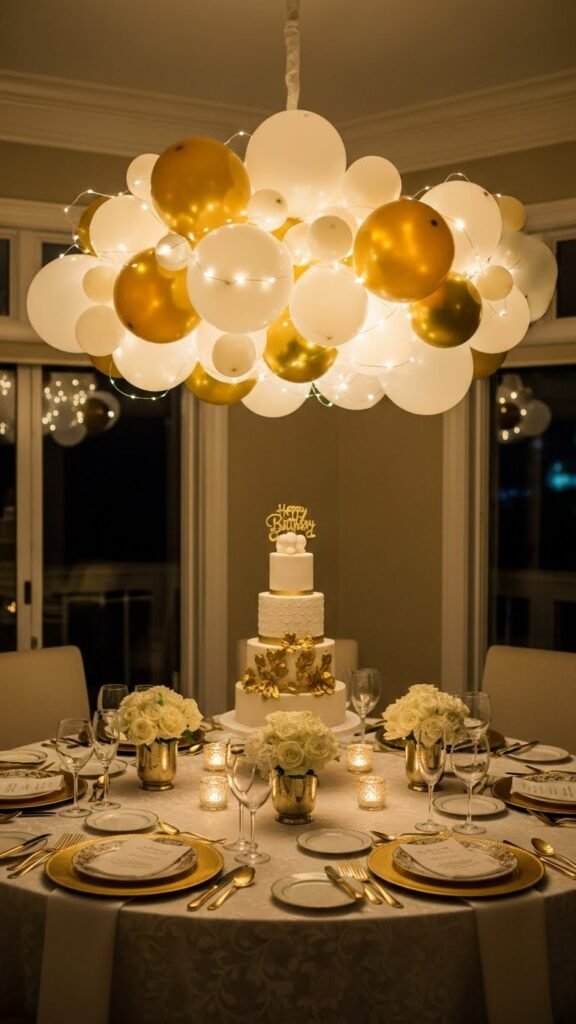
- White + soft gold
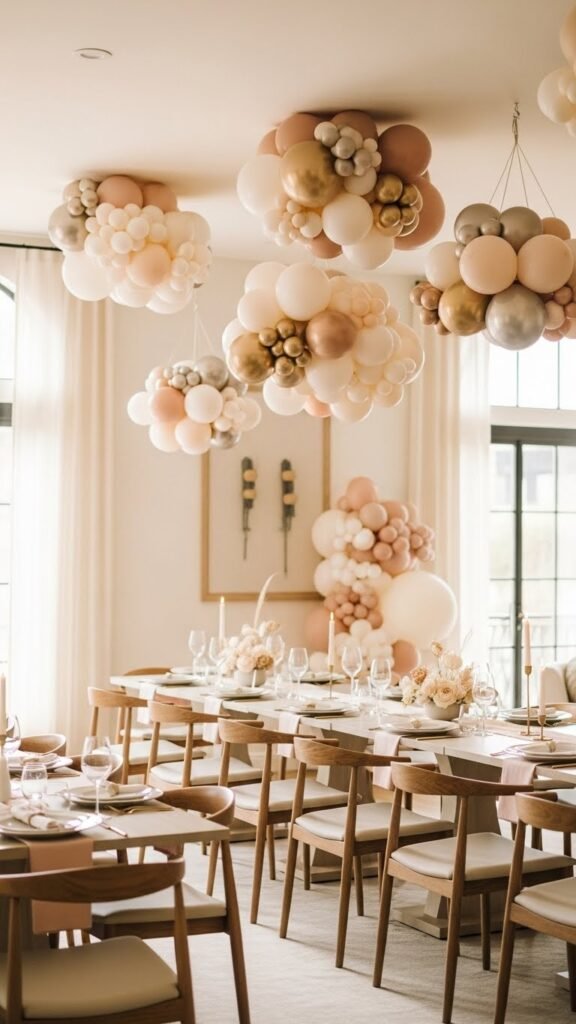
- Blush + cream + nude
- Black + white + metallic accent
- Monochrome (all white or all neutral)
Stick to 2–3 colors max. Mixing too many shades is the fastest way to lose that high-end feel.
Tips for better results:
- Use balloons in different sizes within the same color
- Keep metallics as accents, not the main focus
- Avoid super bright primary colors if you’re aiming for luxury

Supplies You’ll Need (Simple but Strategic)
You don’t need fancy tools, but each item has a purpose.
Gather these basics:
- Balloons in multiple sizes (5”, 10”, 12” work well)
- Clear fishing line or strong thread
- Balloon glue dots or balloon tape
- Ceiling hook, removable adhesive hook, or sturdy light fixture
- Optional: warm fairy lights or curling ribbon
Helpful extras:
- Hand pump (saves time)
- Command hooks for rentals
- Small weights if your chandelier needs balance
Prep everything before you start. Once balloons are inflated, things move quickly.
Step-by-Step: How to Build the Balloon Chandelier
This is where the magic happens. Take it slow and build from the center outward.
Step 1: Create the Hanging Base
Cut several lengths of fishing line at different sizes. Tie them together at the top to form a central knot. This will be the anchor point that attaches to the ceiling.
Think of this like a jellyfish shape:
- Short strings near the center
- Longer strings toward the outside
Step 2: Attach Balloons Gradually
Start attaching balloons along each string using glue dots or balloon tape.
Key tips:
- Alternate balloon sizes for depth
- Cluster balloons close together near the top
- Let balloons space out slightly toward the bottom

Step 3: Build Volume and Shape
Step back often and check the silhouette. The goal is a soft cone or cascading shape, not a straight column.
If something looks off:
- Add a smaller balloon to fill gaps
- Remove one balloon instead of forcing symmetry
- Rotate the chandelier as you work
Add Light and Texture for a High-End Finish
Lighting is what takes your chandelier from “cute” to “lux.”
Easy upgrades:
- Weave warm fairy lights through the balloons
- Add curling ribbon strands for movement
- Use transparent balloons mixed with solids for depth
Keep lighting subtle. You want a glow, not a spotlight.
Where to Hang Balloon Chandeliers for Maximum Impact
Placement matters just as much as design.
Best locations:
- Above the dessert or cake table
- Center of the room for a statement moment
- Over a gift table or photo backdrop
- In clusters for larger spaces
For extra drama:
- Hang multiple smaller chandeliers at different heights
- Pair with simple table décor to avoid visual clutter
- Keep surrounding décor minimal so the chandelier shines
Common Mistakes (and How to Avoid Them)
Even simple décor can go wrong without planning.
Avoid these pitfalls:
- Overloading with too many colors
- Hanging too low where guests bump into it
- Using weak hooks that can’t support weight
- Skipping test assembly before party day
Pro tip: Assemble the chandelier the night before, then hang it the day of the event.
Final Styling Touches That Make It Photo-Worthy
Before guests arrive, do a final check:
- Trim uneven fishing line ends
- Adjust balloon spacing
- Test lighting
- Take a few photos to spot gaps you might miss in person
Final Takeaway
Balloon chandeliers are one of the easiest ways to make a birthday celebration feel luxurious without hiring a decorator. With a thoughtful color palette, balanced shape, and soft lighting, you can create décor that looks straight out of a magazine.
Save this idea for your next celebration—and don’t be surprised when guests ask where you bought it.

Leave a Reply