

There’s something magical about soft, handmade holiday décor. And if you’ve been wanting to add a warm, cozy touch to your Christmas tree this year, DIY wool ornaments are the perfect project. They’re simple to make, beginner-friendly, and surprisingly relaxing. Plus, they bring that charming, cottage-style vibe that feels right at home during the holidays.

Whether you already love crafting or you’re just looking for a calm evening activity, you’ll enjoy creating these squishy, whimsical ornaments from scratch.
What You Need Before You Start
Before you dive into shaping your first ornament, gather a few simple supplies. Most of these can be found at craft stores or online, and you might already have some at home.
Basic materials to collect:
- Wool yarn or wool roving
- Foam or cardboard balls for shaping
- Twine or ribbon for hanging
- Hot glue gun or craft glue
- Small embellishments (mini bells, beads, felt pieces)
- Scissors
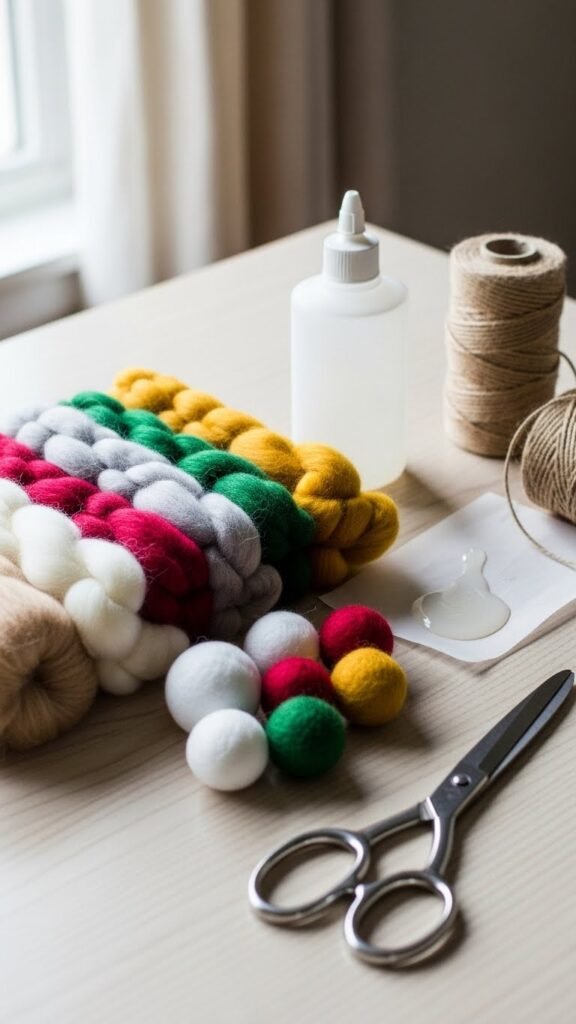
Stick to wool for the softest finish. Acrylic yarn works, but wool gives that fluffy, natural look that makes your ornaments feel extra special.
Step 1: Wrap the Wool Around the Base
This is where your ornament begins to take shape. Start with a foam or tightly rolled cardboard ball. Hold the end of your yarn against the ball and begin wrapping it around in different directions.
Tips for smooth wrapping:
- Keep the yarn snug but not tight.
- Rotate the ball often so you avoid gaps.
- Use a dab of glue at the beginning and end to secure the yarn.
As you wrap, your ornament will grow softer and fuller. The more layers you add, the richer the texture becomes.
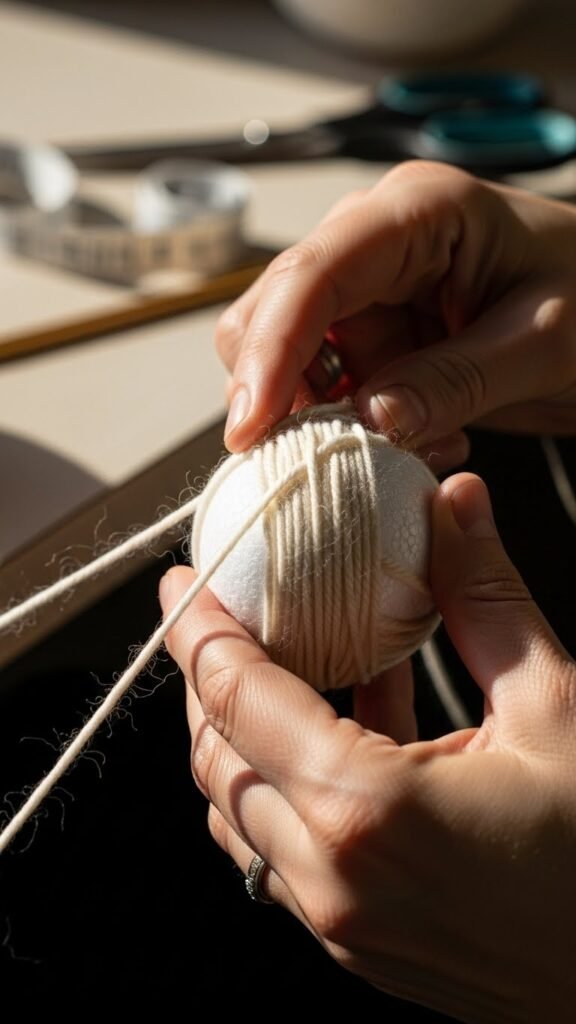
If you want more texture, switch yarn colors halfway through or mix roving and yarn together. It adds a gentle, cozy variation that looks lovely on a Christmas tree.
Step 2: Add Embellishments for Personality
Once your wool base is done, it’s time to make your ornament sparkle—without using anything messy or complicated. Small embellishments give your creations charm and personality.
Ideas to try:
- Mini felt stars or hearts
- Wooden beads or tiny bells
- Linen ribbon bows
- Embroidered initials
Use small touches rather than large decorations. Wool ornaments look best when they stay soft and simple.

Try creating a set with a theme, like all neutral tones, all red-and-white, or a classic woodland palette. These instantly make your tree feel more intentional and cozy.
Step 3: Create the Hanging Loop
This final step is quick but important. The hanging loop brings everything together and makes your ornament functional and ready for the tree.
Here’s what to do:
- Cut a small piece of twine or thin ribbon.
- Form it into a loop and glue both ends securely to the top of your ornament.
- Add a small decorative bow if you want extra charm.
Make sure the loop is centered so the ornament hangs evenly.
Creative Variations to Try
Once you’ve made one ornament, you’ll want to keep going. Here are some fun variations to expand your collection:
Wool-Wrapped Stars or Hearts
Use wooden or cardboard cutouts instead of foam balls and wrap them in yarn for a flat ornament style.
Chunky Wool Pom-Pom Ornaments
Use a pom-pom maker or wrap wool around your fingers until it’s thick and fluffy. Trim evenly for a soft, snowy look.
Mini Sweater-Inspired Ornaments
Wrap wool in color-block patterns to mimic cozy knitwear. Add tiny felt patches for extra detail.
Monogram Ornaments
Wrap a cardboard letter with wool and finish with beads or ribbon. These make thoughtful handmade gifts.
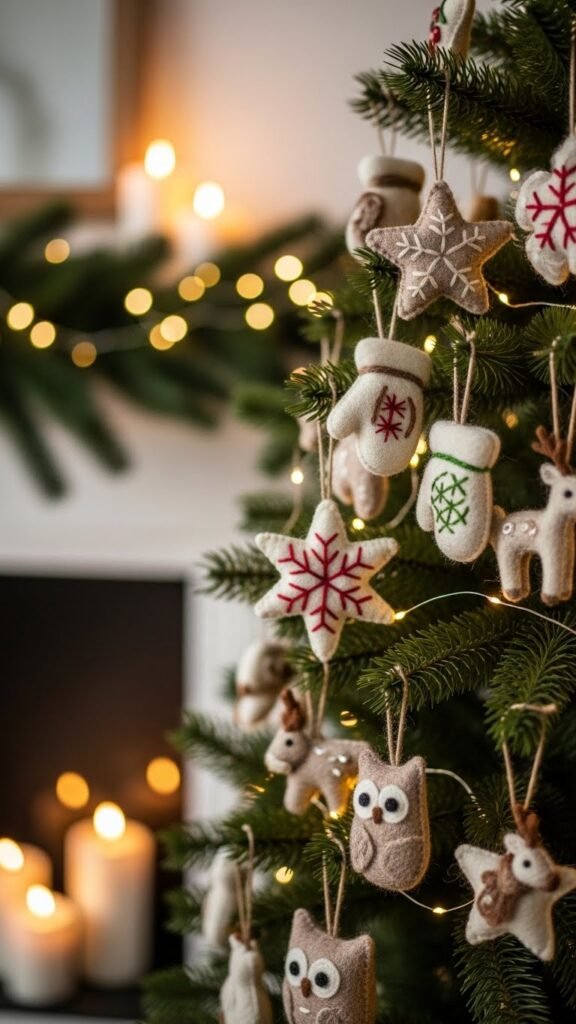
How to Display Your Wool Ornaments
These ornaments are soft, versatile, and look beautiful in many settings—not just on your Christmas tree.
Try placing them:
- In a decorative bowl as part of a table centerpiece
- Hanging across a garland on your mantel
- Tucked into a wreath for added texture
- Attached to wrapped gifts as a personalized tag
Their warm, soft look blends well with rustic, minimalist, Scandinavian, or farmhouse holiday themes.
Final Thoughts
Making your own wool ornaments is a calming, creative way to decorate for Christmas. Each one turns out slightly different, which is part of their charm. With just a few supplies and a bit of imagination, you can fill your home with handmade pieces that feel inviting and heartfelt.
Save this project for later and make a few more ornaments whenever you need a cozy crafting break!

Leave a Reply