

There’s something magical about holiday villages—the soft lights, tiny houses, and nostalgic charm. But what if you could make your own village using cookie jars, simple craft supplies, and a sprinkle of creativity? A DIY Christmas Cookie Jar Village is not only adorable but also easy to customize and display on mantels, kitchen counters, or dining tables.
This fun project blends holiday decorating with the whimsy of miniature worlds. Whether you’re creating a snowy townscape or a cozy cottage scene, the result will feel warm, festive, and utterly enchanting.
What You Need to Get Started
Before you begin crafting the village of your dreams, gather these essentials. Most items are easy to find at craft stores or even around your home.
Basic Supplies
- Clear glass cookie jars (different sizes look best)
- Faux snow or Epsom salt
- Mini bottle-brush trees
- Mini holiday houses (wood, ceramic, or cardboard)
- LED tea lights or micro fairy lights
- Optional: ribbon, small figurines, mini wreaths
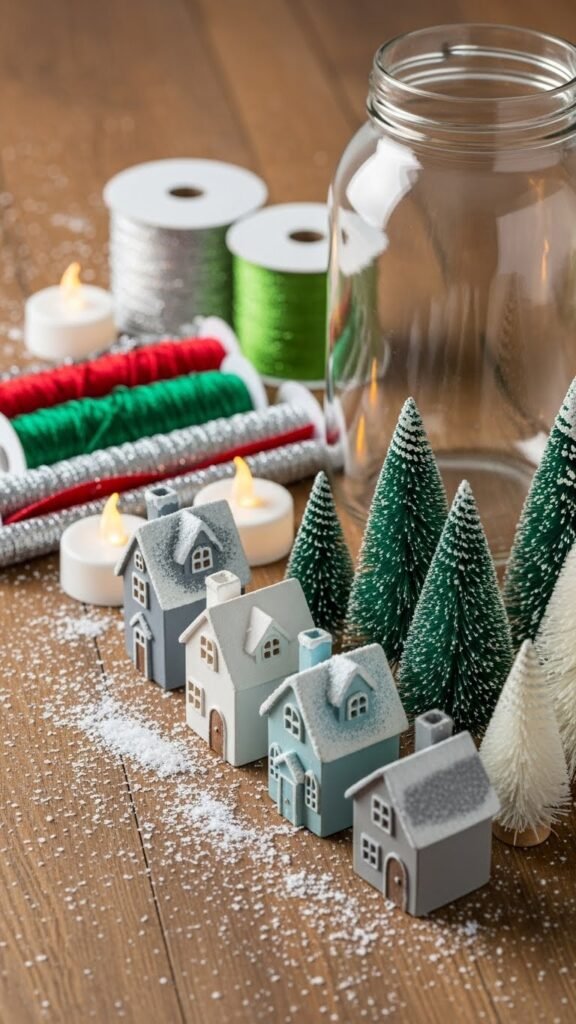
Mixing shapes and heights helps create a layered, realistic village effect. If you want a cozy glow, choose warm LED lights rather than bright white ones.
Step 1: Prep and Clean Your Cookie Jars
Start with a blank, sparkling canvas.
Wipe each jar with a microfiber cloth to remove fingerprints, dust, or leftover smudges. A clean jar makes every detail inside look sharper and more magical.
Make sure the lid fits well—especially if you plan to add fairy lights and need the opening to stay secure.
Step 2: Add a Snowy Base
Every charming Christmas village begins with snow.
Pour a layer of faux snow or Epsom salt into the bottom of each jar. You only need about one to two inches, but you can adjust depending on the height of your mini houses.
Gently shake the jar to level out the snowy layer. This helps the mini pieces sit securely.

Tip: For a softer, fluffier look, mix two types of faux snow for texture variation.
Step 3: Build Your Mini Houses and Scenes
This step is where the magic really happens.
Arrange the Houses First
Place the mini houses inside the jar and gently press them into the snow. Angle them slightly so that the details are visible from outside.
If your houses are lightweight, use a small bit of double-sided tape to hold them in place.
Add Trees and Decor
Once the houses are stable, add:
- Tiny bottle-brush trees
- Mini wreaths
- Little figurines (snowmen, animals, holiday characters)
- Mini street lamps or mailboxes

Keep everything proportional so the village looks balanced and visually pleasing from every angle.
Step 4: Add Lights for a Warm Glow
Lights are what transform your cookie jar village from cute to magical.
Choose LED tea lights or battery-operated micro fairy lights—both are safe, heat-free, and easy to hide.
How to Add Lights
- Tuck fairy lights behind the houses and trees.
- Hide the battery pack under the snow or place it outside the jar behind the display.
- If using LED tea lights, nestle one behind the house to create a glowing window effect.
Avoid overcrowding the scene. A little light goes a long way and keeps the village looking soft and atmospheric.
Step 5: Decorate the Lid and Finishing Touches
Don’t forget the lid—it’s part of the charm.
Easy Lid Decoration Ideas
- Wrap the lid with a festive ribbon.
- Glue a tiny wreath or bow on top.
- Add a thin dusting of faux snow around the edges.
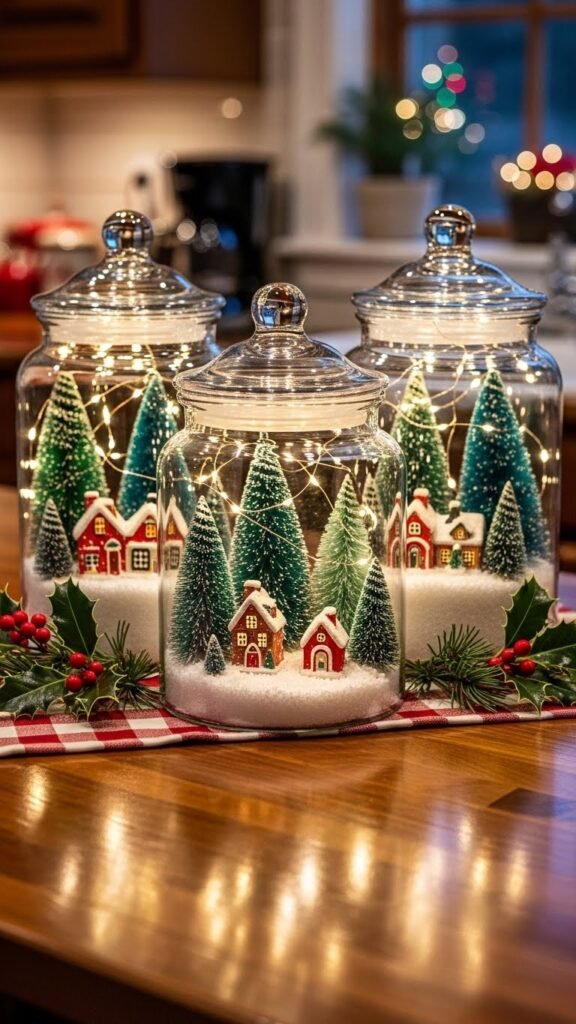
You can also stack jars at different heights using wooden risers or books covered in holiday fabric. This gives your village more depth and turns it into a stunning centerpiece.
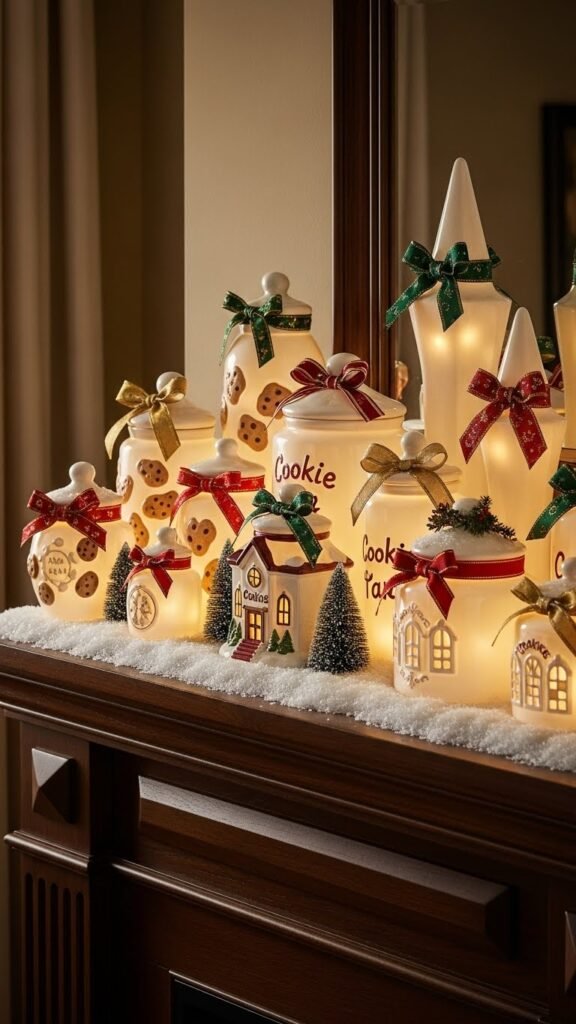
Display Ideas for Your Cookie Jar Village
Where you place your new creation can make it even more magical. Here are a few cozy ideas:
Mantel Display
Line up two or three jars with candles, greenery, and pinecones for a warm holiday look.
Kitchen Counter Magic
Place your cookie jar village next to a tray of cookies or gingerbread for a charming seasonal theme.
Dining Table Centerpiece
Group jars in a cluster and surround them with greenery or LED lights to brighten your holiday meals.
Tips for Customizing Your Village
Your village should feel personal and fun. Here are simple ways to make it uniquely yours:
- Choose houses that reflect your style—modern, vintage, or farmhouse.
- Add tiny wooden signs, candy canes, or holiday fences.
- Use pastel colors for a whimsical look or classic red and green for traditional holiday charm.
- Create small themed zones: a bakery jar, a church jar, or a snowy cottage jar.
Create Holiday Magic in Just a Few Minutes
A DIY Christmas Cookie Jar Village is a beautiful way to bring festive cheer into your home. It’s simple, cozy, and full of charm—perfect for families, holiday crafters, or anyone who loves a magical winter display.
Save this idea for later and create your own glowing Christmas village today!

Leave a Reply