

Creating your own vintage-inspired Christmas décor is one of the easiest ways to bring timeless charm into your home. And if you love cozy, nostalgic decorations that look like they belong in an old-fashioned holiday movie, a DIY bottle brush garland is the perfect project. It’s simple, budget-friendly, and incredibly fun to customize with colors that match your holiday aesthetic.
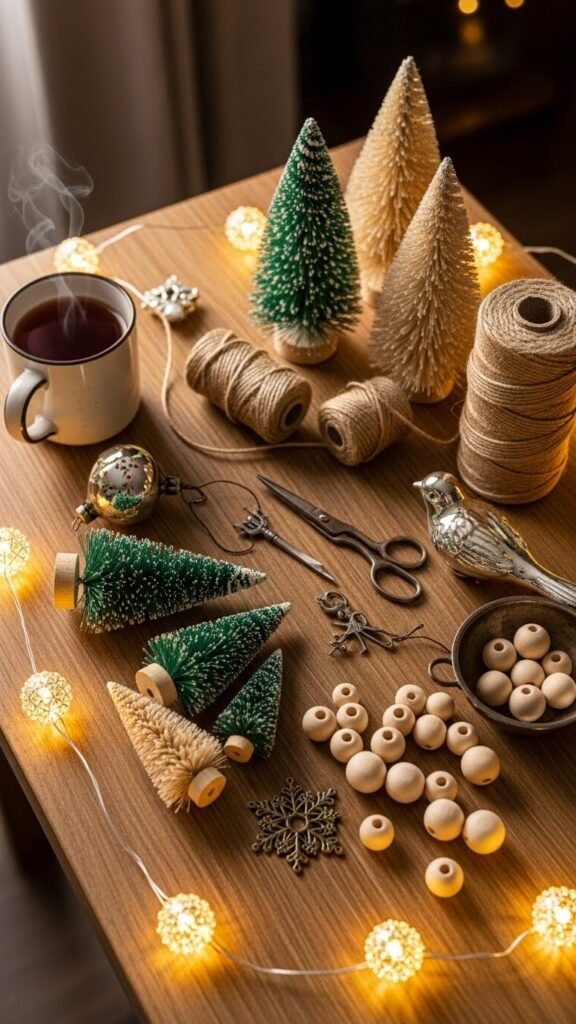
This garland drapes beautifully across mantels, cabinets, banisters, open shelving, or even your front entryway. Let’s break down the supplies, steps, and style ideas so you can create your own stunning vintage piece.
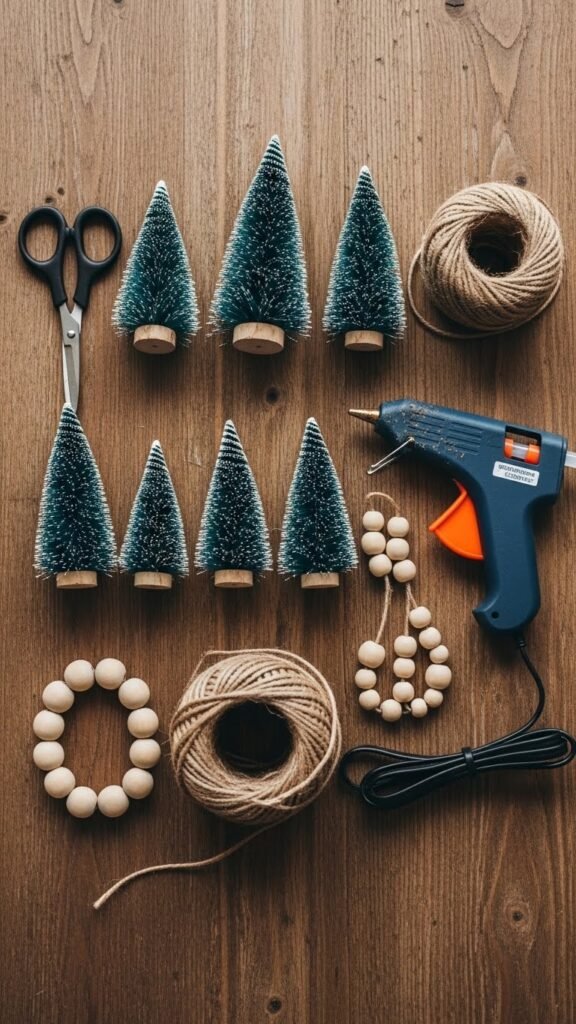
What You Need to Get Started
Gathering the right materials is the foundation of a smooth DIY experience. Thankfully, this project uses easy-to-find, inexpensive items.
You’ll need:
- Mini bottle brush trees (various sizes)
- Twine, jute, or thick cotton string
- Hot glue gun or craft glue
- Wooden beads (optional but adds charm)
- Small eye hooks or floral wire
- Scissors
- Optional: faux snow, glitter, tiny bells, or distressed paint
When choosing bottle brush trees, you’re not limited to green. Soft pastels, frosty whites, bright reds, and muted forest tones all add personality. Mixing the shades makes the garland feel more handcrafted and vintage.
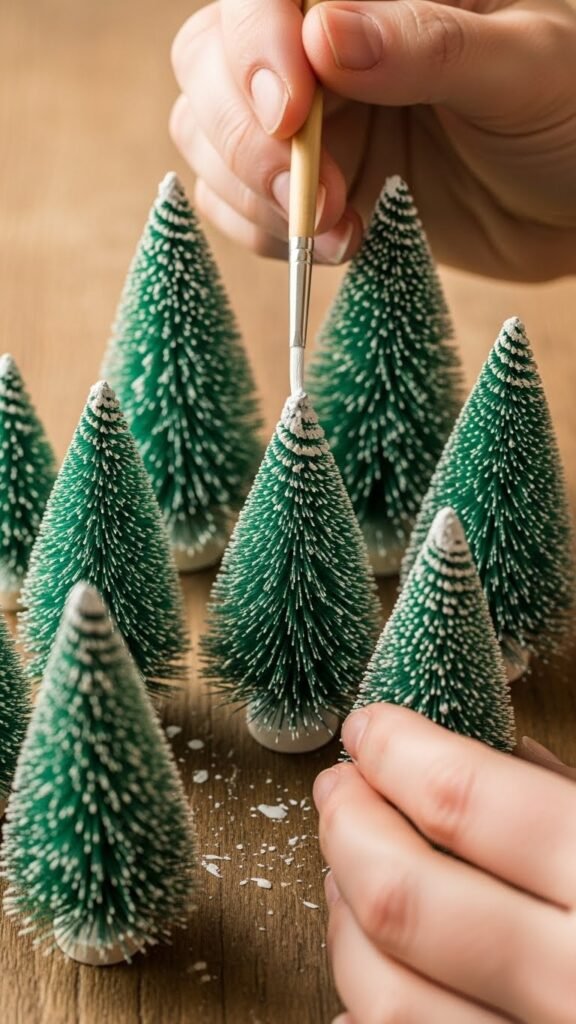
Step 1: Prepare Your Bottle Brush Trees
Before you start stringing them together, prep each tree so it sits nicely on the garland.
Trim the Bases (If Needed)
Some mini trees come with chunky wooden or plastic bases. If the base looks too big, trim it slightly with wire cutters.
Add Eye Hooks or Wire Loops
Screw tiny eye hooks into the top of each tree, or wrap a small piece of floral wire around the top to create a loop.
This loop is where the twine will thread through.
Optional Painting or Distressing
To achieve a more vintage feel, lightly brush the trees with white or antique-style paint for a dusted, snowy look.
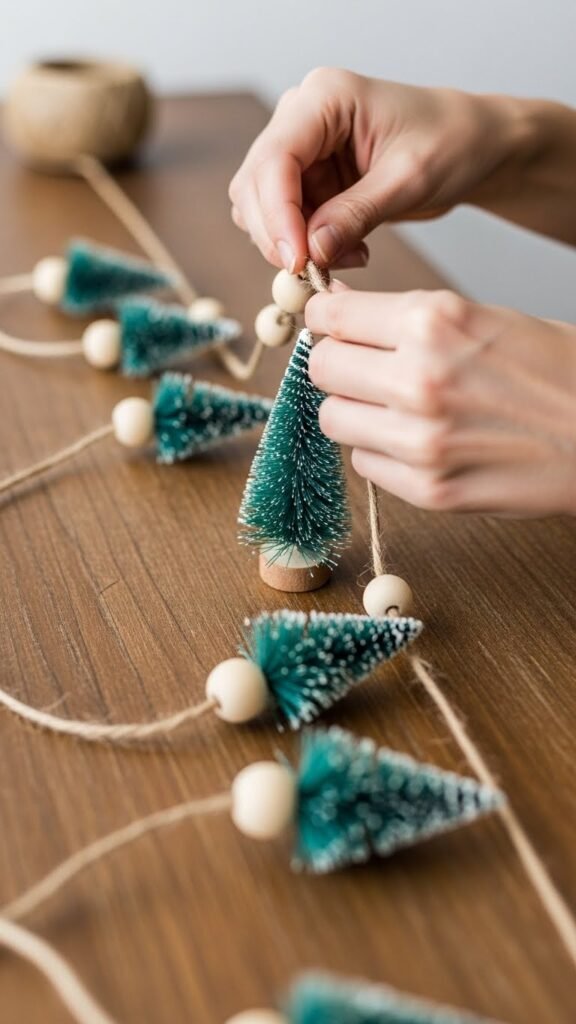
Step 2: Thread the Garland Together
Once your trees are prepped, it’s time to start assembling.
Cut Your Twine or String
Measure the space where your garland will hang. Add several extra inches so the garland drapes naturally.
Thread the Trees
Slide each tree through the twine using the eye hook or wire loop. Space them evenly or cluster them in groups for a fuller look.
Add Wooden Beads for That Vintage Charm
Place a bead before and after each tree for a cottage-style finish.
It adds warmth, texture, and a soft natural look.
Secure with Small Knots
Tie tiny knots on each side of the tree or bead to keep everything in place.
Step 3: Add Your Vintage Finishing Touches
This is where your garland truly transforms from cute to breathtaking.
Dust with Faux Snow
Brush on a tiny amount of craft glue, then sprinkle faux snow for a frosty effect.
Add Mini Bells or Charms
Tiny bells, stars, or metal charms add an old-world festive vibe.
Incorporate Soft Glitter (Optional)
Stick to muted shades like antique gold or soft silver for a timeless look.
Test the Garland’s Drape
Hold it up and see how it falls. Adjust spacing if you want more movement or symmetry.
Where to Hang Your Bottle Brush Garland
This garland is incredibly versatile. Try displaying it in one of these spots:
- Across your fireplace mantel
- Draped along a staircase banister
- Above a kitchen window
- Across open shelving with holiday mugs and greenery
- Wrapped around a mirror for a holiday photo moment
- Along a headboard for a cozy bedroom look
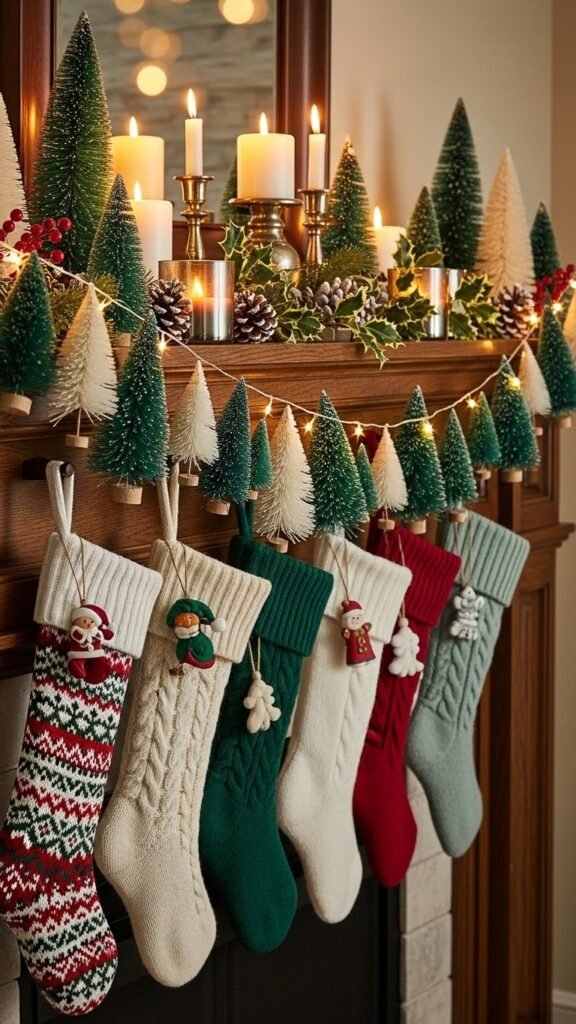
The charm of this piece is how customizable it is — you can make it colorful, minimalist, farmhouse-style, or glam depending on the trees and accents you choose.
Troubleshooting & Extra Tips
Even simple DIYs come with questions. Here are some quick solutions.
The Trees Won’t Stay Upright on the Garland
Add a knot before and after the loop or bead to lock them in place.
The Garland Looks Too Sparse
- Add more trees
- Mix in varying bead sizes
- Cluster the trees in groups of two or three
Twine Feels Too Rough or Rustic
Swap it for soft cotton rope, velvet ribbon, or thin yarn.
Want It to Look More “Vintage”?
Try these small touches:
- Mix muted, dusty colors
- Add lightly distressed wooden beads
- Use off-white or cream twine instead of bright white
- Include small metal charms for an antique finish
Final Display Tips for a Picture-Perfect Look
- Let the garland drape naturally instead of pulling it tight.
- Pair it with greenery (real or faux) for extra fullness.
- Layer it over a second garland — greenery + bottle brush looks beautiful.
- For extra charm, place a few matching bottle brush trees nearby on shelves or the mantel.
Create Your Own Vintage Christmas Magic
A bottle brush garland is one of those DIYs that looks complicated but comes together quickly. With simple tools and a little creativity, you can make a decoration that feels both nostalgic and uniquely yours.
If you found this helpful, save this DIY for later and add it to your holiday craft board!

Leave a Reply