

Dessert jars have a quiet superpower. They turn simple sweets into eye-catching table moments with very little effort. Whether you’re setting up for a birthday, holiday gathering, baby shower, or cozy weekend brunch, decorated dessert jars instantly make the table feel thoughtful and styled.
The best part? You don’t need fancy supplies or advanced skills. A few creative touches go a long way.
Below is a step-by-step guide to decorating dessert jars so they look adorable, intentional, and totally display-worthy.
Choose the Right Jars for Your Display
Before decorating, start with jars that match your vibe. The jar shape sets the tone for everything else.
Popular options include:
- Small mason jars for a classic, cozy feel
- Straight-sided glass jars for a clean, modern look
- Mini weck jars with clips for a charming, bakery-style finish
- Recycled jam or yogurt jars for budget-friendly charm
Keep sizes consistent if you’re lining them up on a table. Uniform jars instantly make displays feel more polished.
If you’re mixing sizes, group them in odd numbers to keep the arrangement balanced and intentional.
Style the Dessert Layers First
The inside of the jar matters just as much as the outside. Layered desserts create visual interest even before decorations are added.
Think in terms of contrast:
- Light and dark layers
- Smooth and textured elements
- Creamy bases with crumbly toppings
Use a spoon or piping bag to keep edges clean. Wipe the inside rim before decorating so the jar looks neat from every angle.
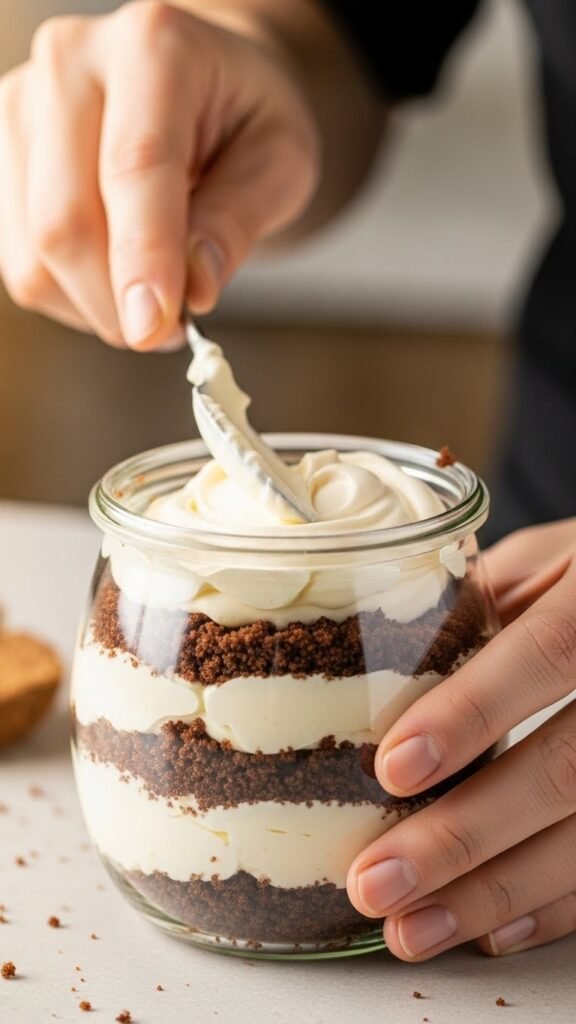
Pro tip: Make the top layer extra attractive. This is what guests see first.
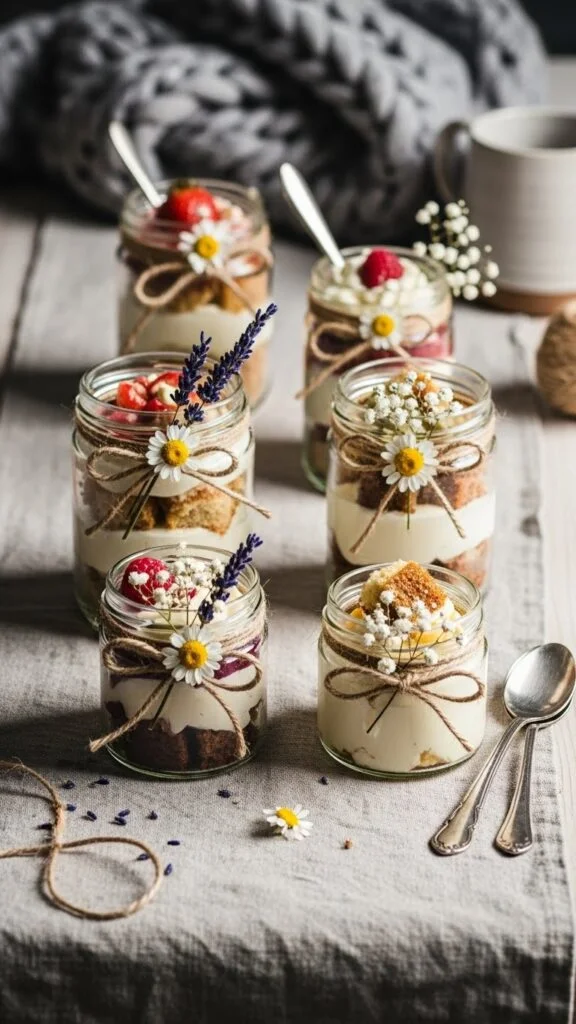
Decorate the Jar Rim and Lid Area
This is where personality shines. A simple rim decoration can transform an ordinary jar into a centerpiece.
Easy ideas:
- Tie twine, jute, or thin ribbon around the neck
- Wrap fabric scraps or lace under the lid
- Add paper doilies or scalloped paper circles
- Use mini tags tied with string for a handmade touch
Stick to one or two materials per jar. Over-decorating can make the display feel cluttered.
For themed tables, match colors to your linens or plates so everything feels connected.
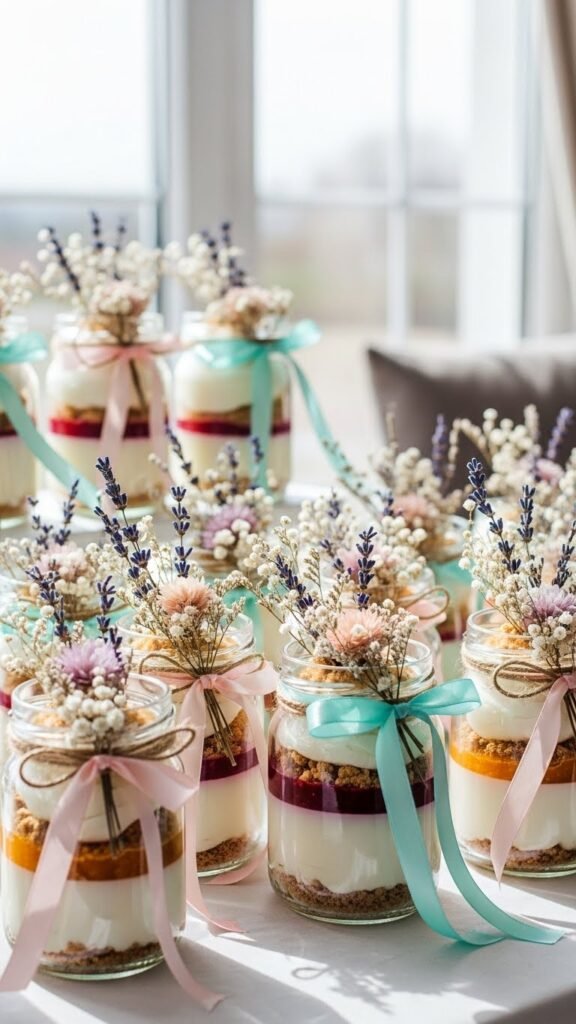
Add Natural or Soft Decorative Accents
Small accents bring warmth and charm without overpowering the dessert.
Try:
- Dried flowers or baby’s breath tucked into twine
- Tiny faux greenery sprigs
- Cinnamon sticks or star-shaped spices for seasonal tables
- Neutral wood beads threaded onto string
Keep accents lightweight so they don’t tip the jar or fall into the dessert.
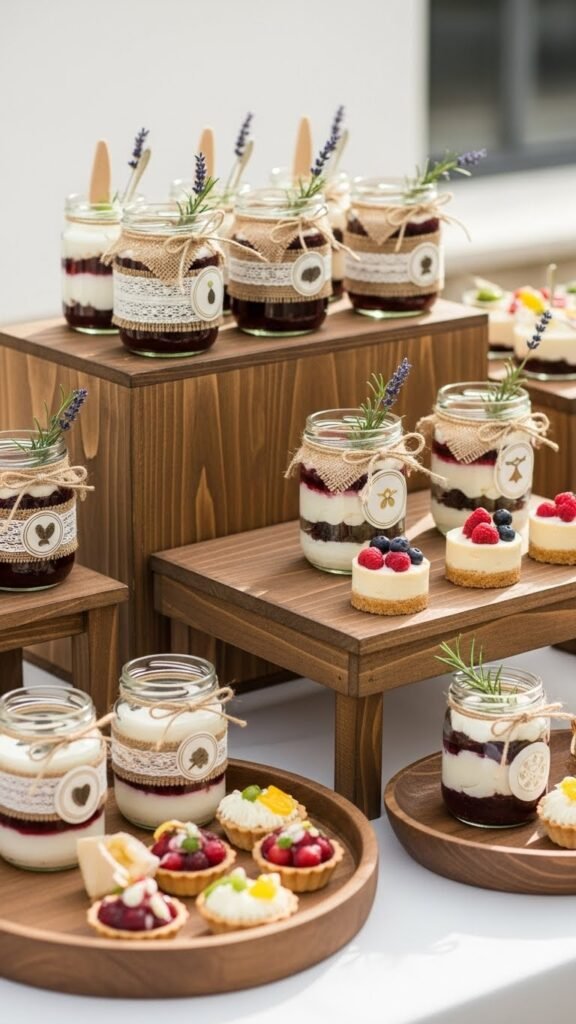
Create Height and Balance on the Table
Once your jars are decorated, think about how they sit together on the table.
Ways to elevate the display:
- Place some jars on cake stands or wooden risers
- Use trays to group jars in neat clusters
- Alternate jar heights to avoid a flat look
- Leave breathing room between groups
Negative space is your friend. A little space helps each jar stand out.
Match Decorations to the Occasion
Tailoring your jar decor to the event makes the display feel extra special.
Ideas by occasion:
- Birthdays: Bright ribbons, playful tags, bold color accents
- Baby showers: Soft pastels, fabric bows, gentle textures
- Holidays: Seasonal colors, greenery, cozy natural elements
- Everyday gatherings: Neutral tones, twine, simple minimal details
You can reuse the same jars year-round by switching out ribbons or accents.
Keep It Practical for Guests
Cute matters, but usability matters more.
Before setting everything out:
- Make sure decorations don’t block the opening
- Avoid anything that sheds into the dessert
- Keep tags readable but not oversized
- Test one jar as a guest would use it
A beautiful display should still be easy to enjoy.
Final Touches That Make It Feel Finished
Once jars are placed:
- Adjust ribbons so they face forward
- Straighten tags and accents
- Wipe glass for fingerprints
- Step back and view the table as a whole
Small adjustments make a big difference in photos and real life.
Final Takeaway
Decorating dessert jars doesn’t have to be complicated. With thoughtful layers, simple decorations, and balanced table styling, you can create cute displays that feel warm, welcoming, and totally Pinterest-worthy.
Save this idea for your next gathering and turn everyday desserts into a table feature everyone notices.

Leave a Reply