

If you love cozy, handmade Christmas décor, rustic twine trees are the perfect craft to try this season. They’re simple, charming, and add that warm farmhouse touch everyone adores during the holidays. Plus, you can customize them endlessly—whether you prefer glittery finishes, natural textures, or a little woodland flair.

Let’s dive into this fun and budget-friendly project!
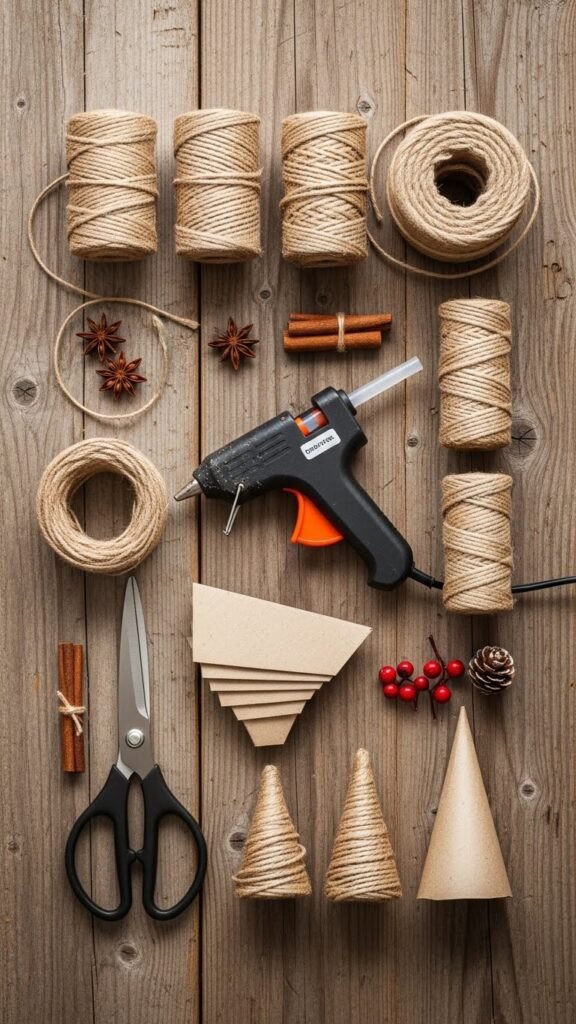
What You Need to Get Started
Before rolling up your sleeves, gather a few simple supplies. You may already have most of them at home.
- Twine or jute string
- Cardboard cones or DIY paper cones
- Hot glue gun + glue sticks
- Scissors
- Optional décor: mini bells, faux berries, tiny pinecones, glitter, ribbon
Keeping everything organized makes this craft smooth, stress-free, and fun.
Step 1: Build or Prep Your Cone Base
If you bought premade cardboard cones—great! If not, don’t worry. You can make your own in minutes.
How to make a DIY cone base:
- Roll a piece of cardstock or thin cardboard into a cone shape.
- Adjust the height and width to your liking.
- Tape the seam securely.
- Trim the bottom so it stands flat.
Aim for a sturdy structure because the twine will add a little weight.
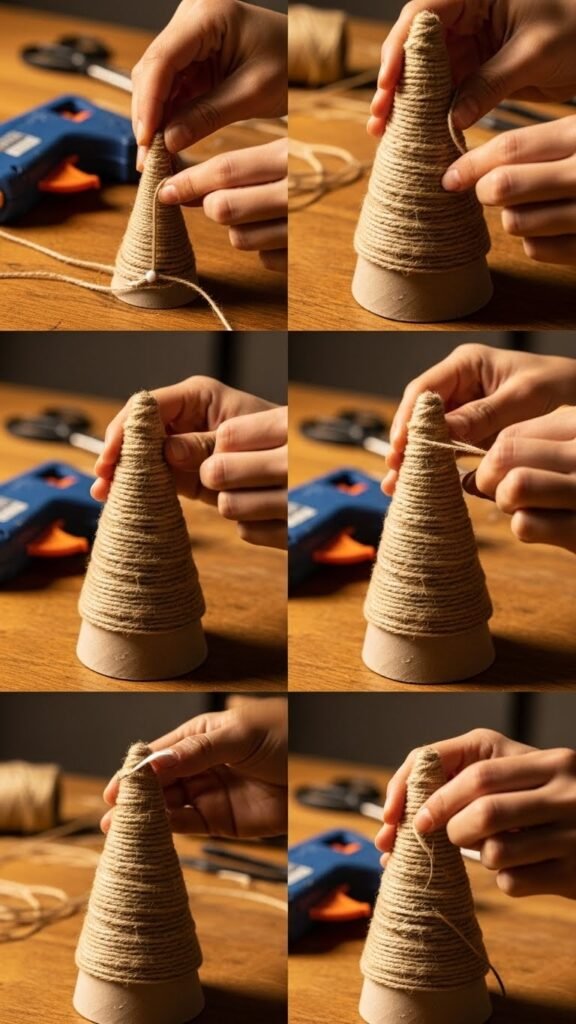
Step 2: Start Wrapping the Twine
Here’s where the magic happens! Twine transforms an ordinary cone into a rustic mini Christmas tree.
- Add a small dab of hot glue at the top of the cone.
- Press one end of the twine into the glue and let it set.
- Begin wrapping the twine tightly around the cone, row by row.
- Keep the layers close together so no gaps show.
- Occasionally add small glue dots to secure the twine and prevent slipping.
Take your time—slow wrapping creates a cleaner look.
Step 3: Add Details and Decorative Touches
Once your cone is fully wrapped, you can leave it natural—or dress it up! This is where your creativity comes in.
Ideas for finishing touches:
- Mini bells or stars at the top
- Faux red berries for a festive pop
- A dusting of eco-friendly glitter
- Twine bows or thin neutral ribbons
- A wrap of subtle lace for added texture
- Tiny pinecones glued in spirals or clusters
Keep the look rustic or go slightly elegant—it’s all up to you.

Step 4: Add Details and Decorative Touches
Now that your trees are finished, it’s time to show them off!
Great places to display them:
- On a holiday mantel
- As a table centerpiece
- Paired with lanterns or winter village sets
- On entryway tables to greet guests
- Added to tiered trays for a cozy farmhouse look
- Mixed into a bookshelf display
Try grouping them in sets of three for a balanced, layered visual.
Customization Ideas to Try
If you’re crafting with family or making multiple trees for gifts, switch up the style each time:
- Neutral Farmhouse: Plain twine, wooden beads, soft greenery
- Glitter Glow: Metallic-tipped twine, shimmering accents
- Woodland Lodge: Pinecones, bark chips, cedar sprigs
- Scandi Minimalist: White twine, matte finishes, simple stars
- Color Pop: Twine dipped lightly in acrylic paint for ombré effects
These little trees are incredibly versatile, and each variation brings a different holiday mood.
A Few Extra Tips for a Smooth Crafting Experience
- Use a low-temp glue gun if you’re crafting with kids.
- Wrap tighter at the top and looser near the bottom for an even shape.
- Let your trees dry fully before adding heavy decorations.
- Mix twine thicknesses for unique textures.
- Always keep your fingers clear of hot glue (we’ve all learned the hard way!).
Conclusion
Rustic DIY Christmas twine trees are the perfect handmade décor for cozy holiday decorating. They’re beginner-friendly, affordable, and endlessly customizable—making them great for crafting sessions, gifting, or adding a warm organic touch to your space.
If this project inspired you, save this idea for later and try making a whole forest of twine trees this season!

Leave a Reply