

If you want an adorable holiday centerpiece that’s inexpensive, festive, and easy to customize, a DIY Christmas ribbon topiary is the perfect project. It’s lightweight, charming, and fits beautifully on dining tables, shelves, mantels, or entryway consoles.

This project is beginner-friendly and uses simple craft supplies you can find at any store. The best part? You can make it match any holiday color theme you love.
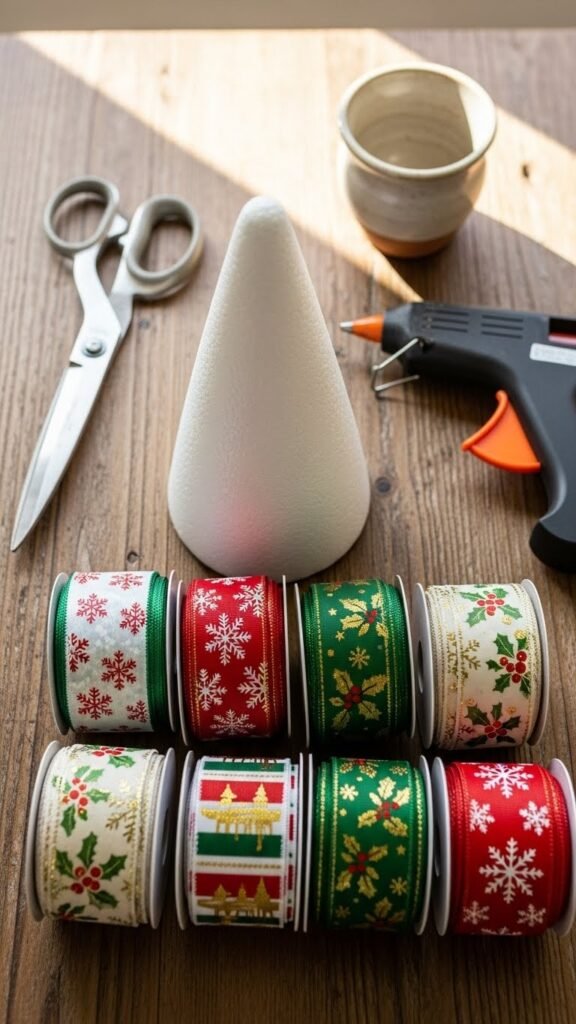
What You’ll Need
Before we jump into the fun part, here’s a quick list of what you’ll want to gather:
- Foam cone (any size, but 10–14 inches works well)
- Ribbon (wired ribbon works best)
- Hot glue gun and glue sticks
- Small decorative pot or container
- Scissors
- Optional décor: mini ornaments, bells, faux greenery, small LED lights
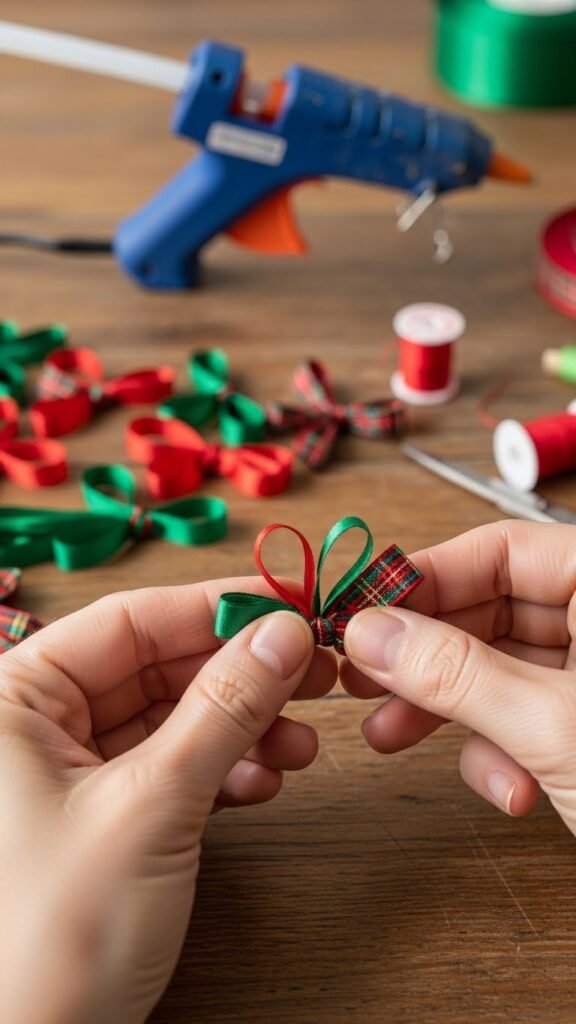
Cut and Prep Your Ribbons
To create the signature “topiary bow texture,” you’ll be making lots of little loops.
Cut your ribbon into pieces that are about 4–6 inches long. Wired ribbon holds a shape better, but any ribbon will work if you don’t mind fluffing it more. Once you’ve cut a good pile, fold each piece into a loop and secure the ends with a dot of hot glue.
Do this in batches so you don’t feel overwhelmed. You can mix colors, textures, and patterns for a layered holiday look. Classic choices include plaids, metallics, velvet ribbons, or even neutral beige with gold threads for a rustic luxury vibe.
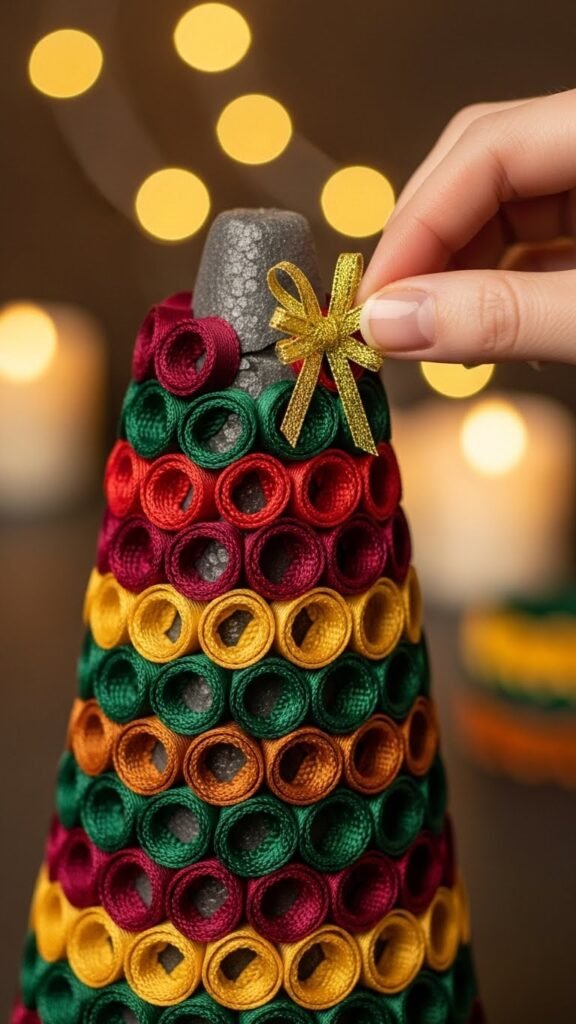
Start Layering the Ribbon Loops
Now that your loops are ready, it’s time to build the topiary.
Start at the bottom of the foam cone. Add a small dot of glue and press a ribbon loop in place. Continue gluing loops side by side, working your way around the cone in a ring. When the bottom row is filled, move up to the next row.
Keep staggering your loops so the cone looks full and fluffy. This gives your topiary a polished, professional finish. You’ll notice that the smaller your ribbon loops are, the denser and more ornament-like your topiary becomes.
For extra dimension, alternate between shiny and matte ribbon textures. It creates a gorgeous depth that’s especially eye-catching under soft lights.
Fill in Any Gaps
Once your cone is mostly covered, step back and check for bare spots. Sometimes small gaps appear, especially near the top or between rows. Fill these with extra ribbon loops, tiny bows, or even mini ornaments if you want a more decorative look.
If your topiary still looks a bit flat, gently fluff each loop outward. Wired ribbon responds beautifully to shaping, and even non-wired ribbon can look much fuller with a little attention.
Secure the Top and Add Final Details
The top of your ribbon topiary deserves a special finishing touch. You can top it with:
- A small star ornament
- A larger bow
- A faux berry cluster
- A mini bell
- A glittery pinecone
Whatever you choose, use a generous amount of glue so it stays secure.
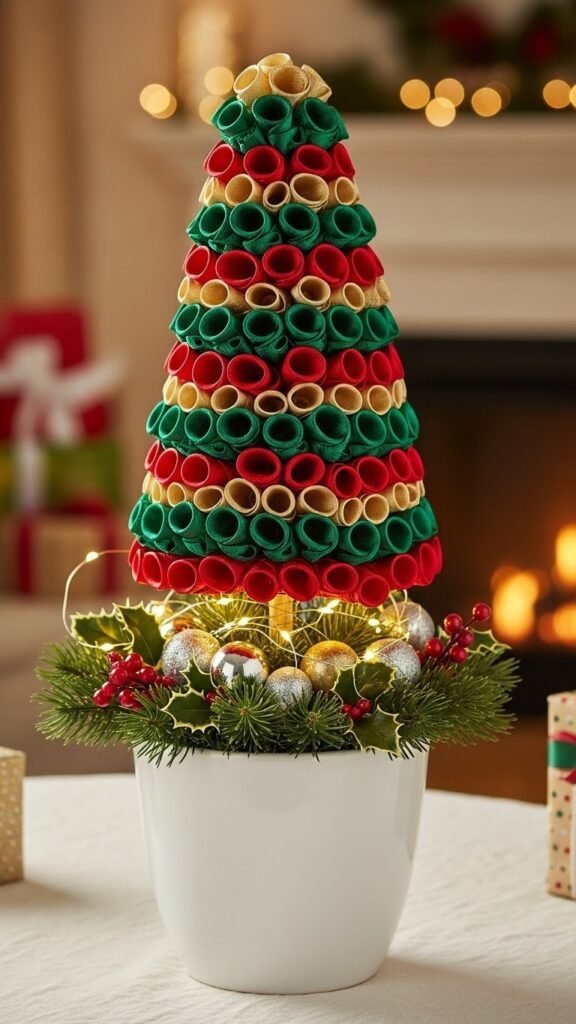
For the base, simply place the foam cone into a small pot or container. If it doesn’t fit snugly, use a bit of hot glue or stuff the pot with tissue paper for grip. Add faux greenery around the base if you want to hide any exposed foam or give it a more natural finish.
Optional: Add Mini Lights
If you want your ribbon topiary to glow like a tiny Christmas tree, wrap a small LED string around the ribbons. Choose battery-powered lights with a thin wire, so they blend in easily.
This works especially well for table centerpieces where you want a soft, magical glow—perfect for evening gatherings or holiday dinners.
Styling Your Ribbon Topiary Around the Home
One of the best things about these topiaries is how versatile they are. You can place them:
- On your dining table as a centerpiece
- On bookshelves or mantels
- In pairs on your entryway console
- In your kitchen for a cozy seasonal touch
- Beside candles or garlands for a layered holiday display
If you like symmetrical décor, make two matching topiaries. If you prefer a whimsical look, mix and match different ribbon colors and cone sizes.
These also make adorable handmade gifts for neighbors, friends, or coworkers—just choose ribbon colors that match their décor style.
Final Touches and Tips
A few helpful reminders as you finish your project:
- Don’t worry if your loops aren’t perfectly uniform. Variation adds charm.
- Use protective gloves if your glue gun runs hot.
- Keep your ribbons slightly angled when gluing to help them nest together naturally.
- Display your topiary away from direct sunlight to protect the ribbon colors.
- Add a light mist of craft-safe glitter spray if you want extra sparkle.
Wrap-Up
Making a cute DIY Christmas ribbon topiary is simple, fun, and incredibly customizable. It’s one of those crafts that looks expensive but takes just a little time and creativity to put together. Save this idea, try different color schemes, and create a full collection for the holidays.
Save this decorating idea for later!

Leave a Reply