

Nothing transforms a plain wall faster than a balloon backdrop. Whether you’re hosting a birthday party, baby shower, graduation, or cozy at-home celebration, balloon backdrops instantly add color, texture, and a “wow” factor that looks amazing in photos.
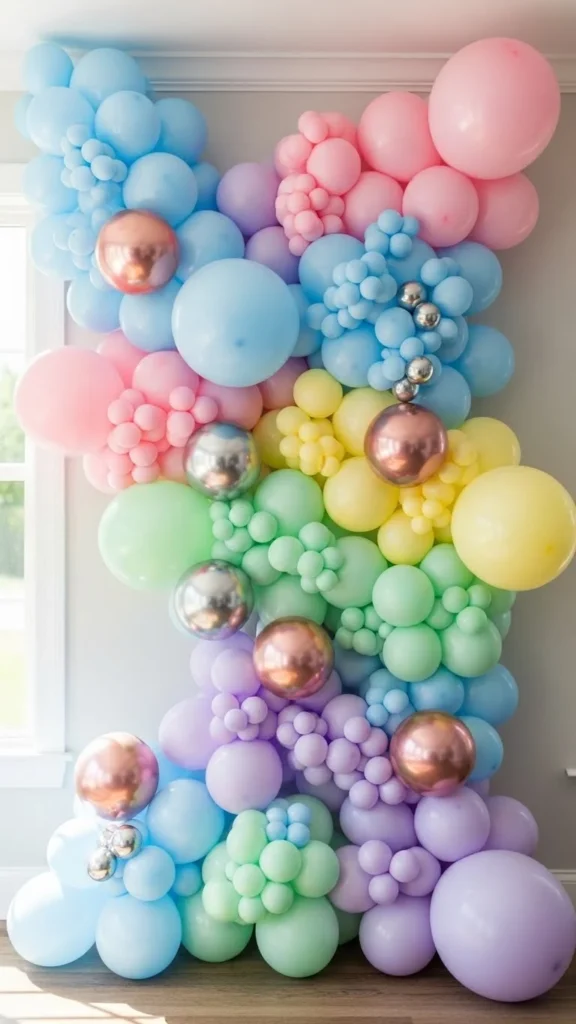
The best part? You don’t need professional tools or a big budget to create one. With a few simple supplies and some easy techniques, you can make a balloon backdrop that looks polished, playful, and totally Pinterest-worthy.
Why Balloon Backdrops Work So Well
Balloon backdrops are popular for a reason. They’re flexible, customizable, and visually striking without feeling stiff or formal.
Here’s why they’re a go-to decoration:
- They instantly fill empty wall space
- They work for any theme or color palette
- They look great in photos from any angle
- They’re lightweight and renter-friendly
- They can be reused or repurposed
From small accent arches to full wall displays, balloon backdrops adapt easily to your space and occasion.
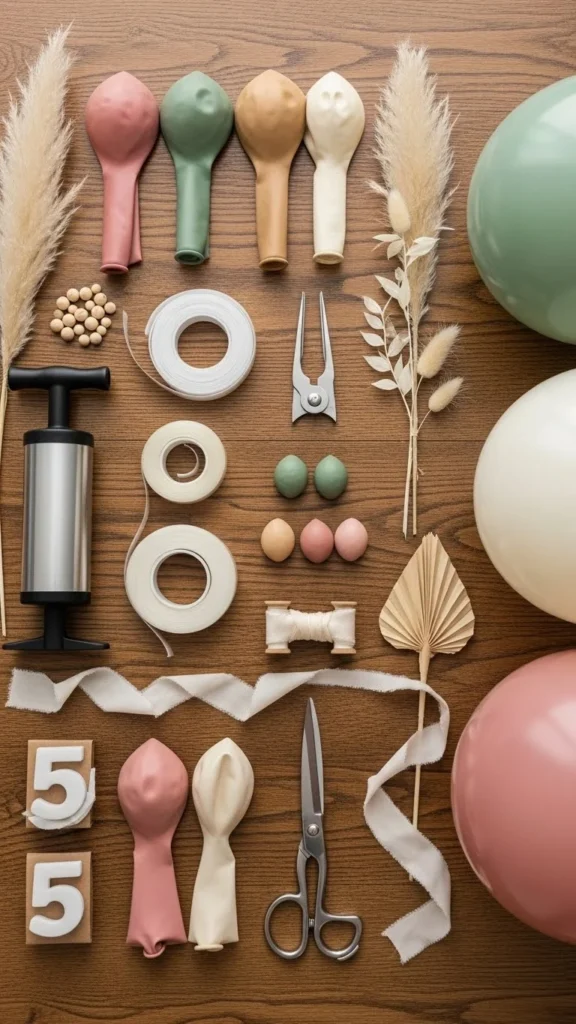
Gather Your Supplies Before You Start
Before inflating anything, set yourself up for success by gathering everything you’ll need.
Basic supplies:
- Balloons in multiple sizes (5″, 10″, 12″, and a few larger ones)
- Balloon strip or balloon tape
- Hand pump or electric pump
- Clear hooks or removable wall adhesive
- Scissors
- Optional accents: greenery, ribbons, tassels, paper fans
Pro tip: Stick to one main color, one accent color, and one neutral for a balanced, professional look.
Choose the Right Style for Your Space
Not all balloon backdrops look the same. Choosing the right style helps your setup feel intentional instead of overwhelming.
Popular balloon backdrop styles:
- Organic balloon garland – asymmetrical and modern
- Balloon wall – full coverage for maximum impact
- Half-arch or corner garland – perfect for small rooms
- Frame-wrapped garland – balloons attached around a photo frame or stand
Think about:
- Wall width and ceiling height
- Where photos will be taken
- Whether the backdrop is the main focus or a supporting detail
For small spaces, corner or half-wall designs usually look best and feel less crowded.
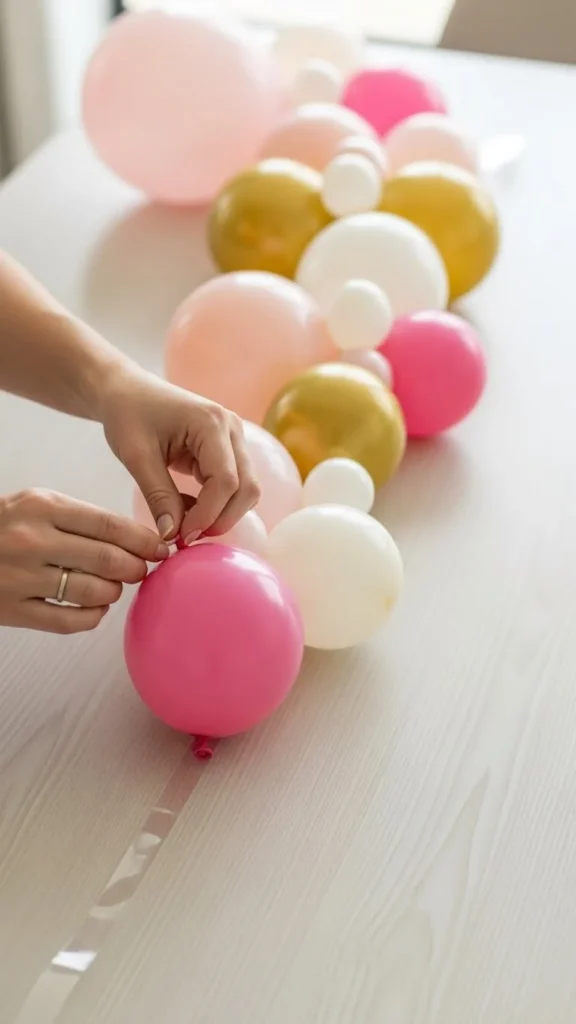
Build Your Balloon Garland Step by Step
This is where the magic happens. Don’t worry—balloon garlands are much easier than they look.
Step 1: Inflate balloons in varied sizes
Blow up balloons slightly differently so they aren’t all identical. This adds depth and a natural flow.
Step 2: Attach balloons to the strip
Insert balloon knots into the holes of the balloon strip, alternating sizes and colors as you go.
Step 3: Shape as you build
Don’t keep the strip straight. Gently curve and twist it while attaching balloons so it feels organic.
Step 4: Fill gaps
Use smaller balloons to fill any empty spaces. This is what gives that full, professional finish.
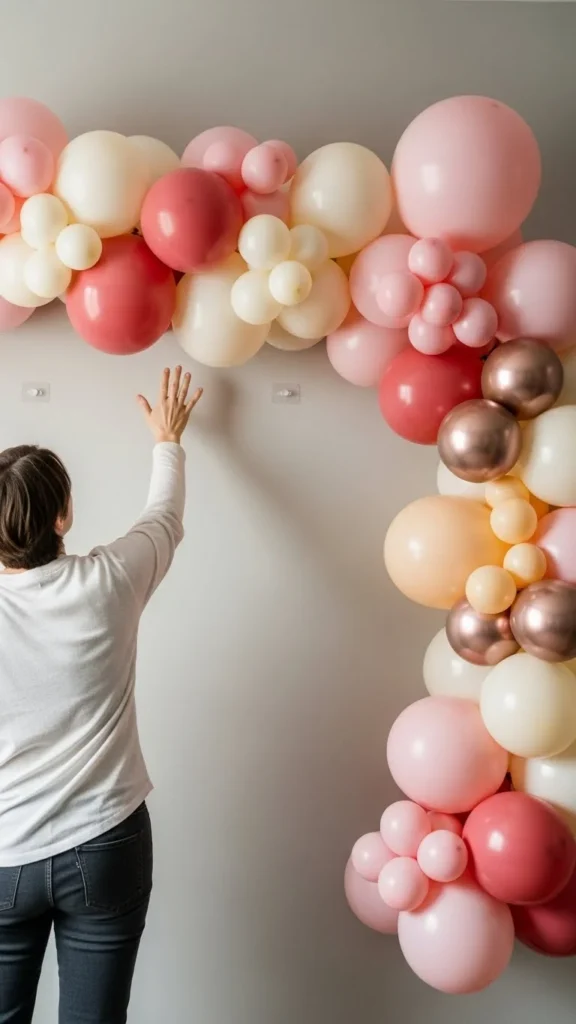
Secure the Backdrop to the Wall Safely
Once your garland is complete, it’s time to hang it up without damaging your walls.
Easy hanging methods:
- Clear adhesive hooks
- Removable wall strips
- Painter’s tape (for lightweight sections)
Start by securing the top or center point first. Then adjust the sides until the shape looks balanced.
Helpful tip: Step back often and check how it looks from a photo angle, not just up close.
Add Simple Details That Elevate the Look
This is where your backdrop goes from “cute” to “camera-ready.”
Easy upgrades:
- Tuck in faux greenery for texture
- Add ribbon tails for softness
- Mix matte and glossy balloons
- Use a few oversized balloons as focal points
Keep accents minimal so the balloons stay the star of the show.
Lighting Makes a Big Difference
Good lighting can completely change how your balloon backdrop photographs.
Try:
- Natural window light whenever possible
- Soft floor lamps aimed at the wall
- Warm string lights placed around (not on) the balloons
Avoid harsh overhead lighting, which can flatten the colors in photos.
Common Mistakes to Avoid
Even simple projects have a few pitfalls. Watch out for these:
- Over-inflating balloons (they pop more easily)
- Using too many colors
- Hanging the garland too high
- Skipping smaller balloons for gap filling
Taking a little extra time here makes a big visual difference.
Final Thoughts
Balloon backdrops are one of the easiest ways to turn any wall into a picture-perfect moment. With a clear plan, a simple color palette, and a little creativity, you can create a backdrop that looks thoughtfully styled and photo-ready—no professional help required.
Save this guide for your next celebration and try your own balloon backdrop at home. Once you make one, you’ll want to create them for every event!

Leave a Reply