

Bright colors, sweet surprises, and a little hands-on fun—candy cones check every box when it comes to treats kids absolutely love. Whether you’re planning a birthday party, classroom celebration, holiday table, or just a rainy-day activity, candy cones are easy to make and endlessly customizable. The best part? Kids can help assemble them, which makes the treats feel even more special.
Below, you’ll learn how to make candy cones step by step, plus creative ideas to turn simple sweets into irresistible party favorites.
Why Candy Cones Are a Kid Favorite
Candy cones feel magical because they combine visual excitement with surprise. Kids don’t just see candy—they see layers, colors, and shapes all stacked together.
They’re popular because:
- Each cone feels like a personal gift
- Colors instantly grab attention
- No plates or utensils needed
- Easy to customize for themes or ages
Candy cones also work well as party favors, school treats, or dessert table fillers. One small cone can go a long way when it’s packed thoughtfully.
What You Need to Make Candy Cones
Before you start filling, gather your supplies. Keeping everything ready makes assembly fast and fun.
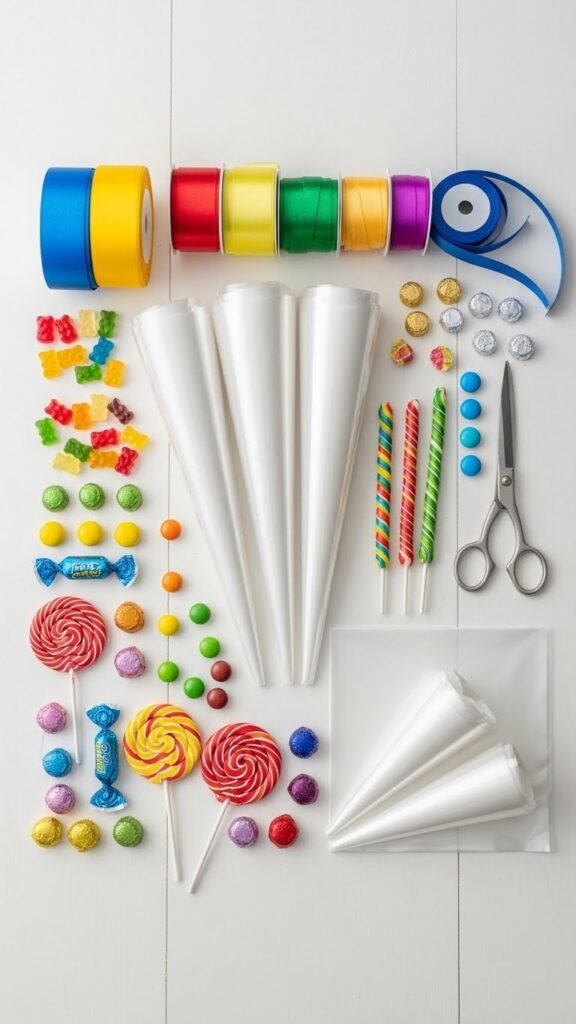
Basic supplies
- Clear cellophane sheets or pre-made cone bags
- Twist ties, ribbon, or string
- Scissors
- A clean surface for stacking candy
Candy filling ideas
- Mini chocolate candies
- Gummy bears or gummy worms
- Jelly beans
- Marshmallows
- Candy-coated chocolates
- Small hard candies
Tip: Use a mix of textures—soft, chewy, and crunchy—to keep each cone exciting.
Step-by-Step: How to Assemble Candy Cones
Making candy cones is simple, but the order matters if you want them to look polished.
1. Shape the cone
Lay a cellophane sheet flat. Roll it into a cone shape, keeping the tip tight so small candies don’t slip out. Secure the seam with a small piece of tape or a twist tie near the top.
2. Start with a sturdy base
Add heavier or larger candies first. This helps the cone stand upright and keeps delicate candies from getting crushed.
Good base candies include:
- Chocolate pieces
- Wrapped candies
- Marshmallows
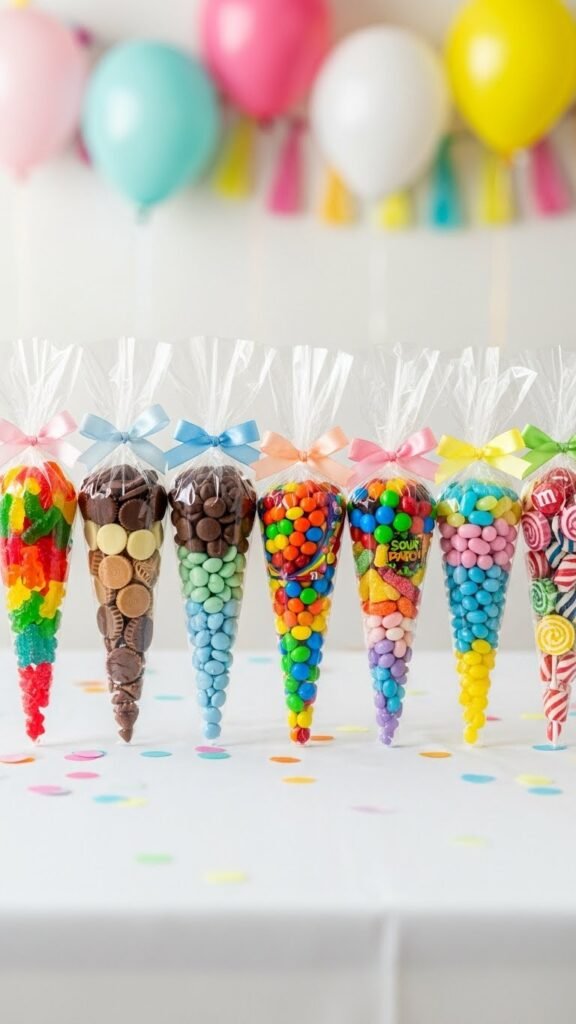
3. Layer by color
Now comes the fun part. Add candies in layers, grouping similar colors together. This creates stripes that look great through clear wrapping.
4. Fill to the top
Leave about two inches at the top so you can close the cone neatly. Don’t overfill—too much candy makes sealing tricky.
5. Tie and fluff
Gather the top, twist gently, and tie with ribbon or string. Trim the excess cellophane into a soft fringe for a festive finish.
Theme Ideas Kids Go Crazy For
Candy cones are easy to match with party themes. A few small tweaks make them feel custom and exciting.
Rainbow cones
Use candies sorted by color for bold, cheerful layers. These are perfect for birthdays and school events.
Character colors
Choose two or three colors that match a favorite character or party theme. Even simple color combos feel intentional.
Holiday cones
- Pastels for spring
- Bright shades for summer parties
- Warm tones for fall
- Red, green, and white for winter

Kid-Friendly Tips That Make a Big Difference
A few small details can turn basic candy cones into standout treats.
- Use gloves or scoops to keep everything clean
- Add a surprise topper, like a small sticker or tag
- Mix candy sizes for visual interest
- Label allergens if serving a group
- Let kids design their own cones as an activity
You can even set up a mini “candy cone bar” where kids choose their layers. It doubles as entertainment and dessert.
How to Store and Display Candy Cones
Candy cones are best when fresh, but they’re easy to prep ahead.
Storage tips
- Keep cones in a cool, dry place
- Avoid heat that could soften candies
- Store upright in containers or boxes
Display ideas
- Stand cones in jars or cups
- Arrange them in baskets by color
- Lay them flat on a dessert table with tags

Final Takeaway
Candy cones are proof that simple treats can feel extra special with a little creativity. With bright colors, fun layers, and endless theme options, they’re guaranteed to make kids smile. Plus, they’re easy enough to make at home and flexible for any event.
Save this idea for your next party—and let kids help build their own candy cone creations!

Leave a Reply